Integration
Windows Devices
This guide will assist you in connecting your Windows system to your ProxyPanel 4G and 5G mobile proxy, enhancing online security and enabling access to restricted websites.
Configuring the proxy server in Windows Settings
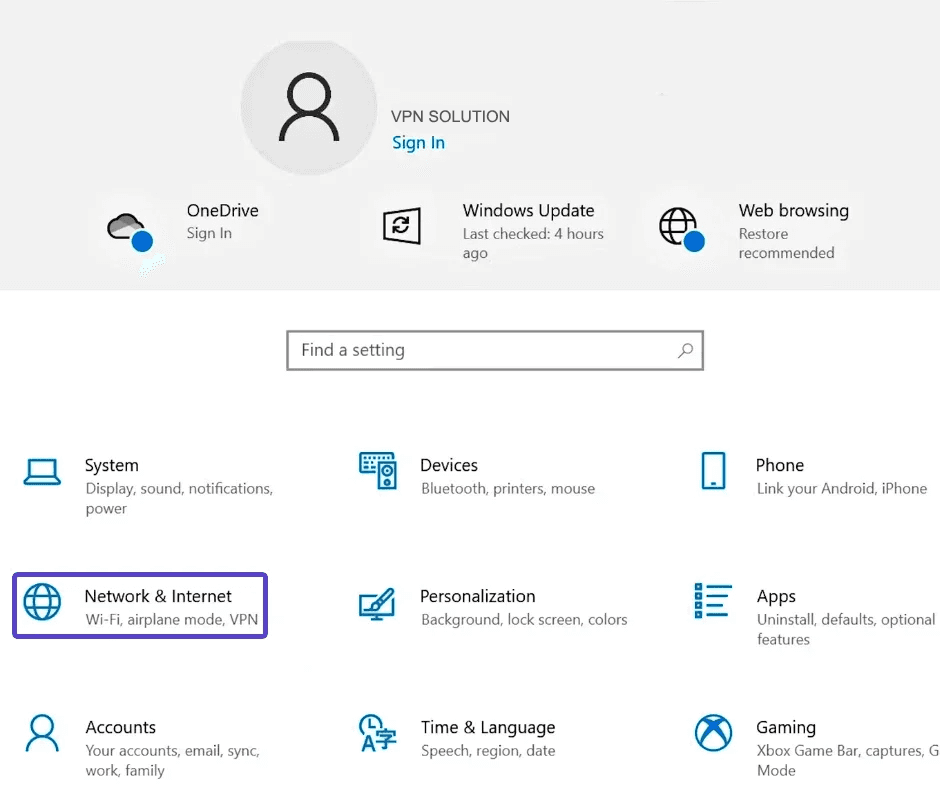
To access network settings, click the Start button and navigate to Settings > Network & Internet.
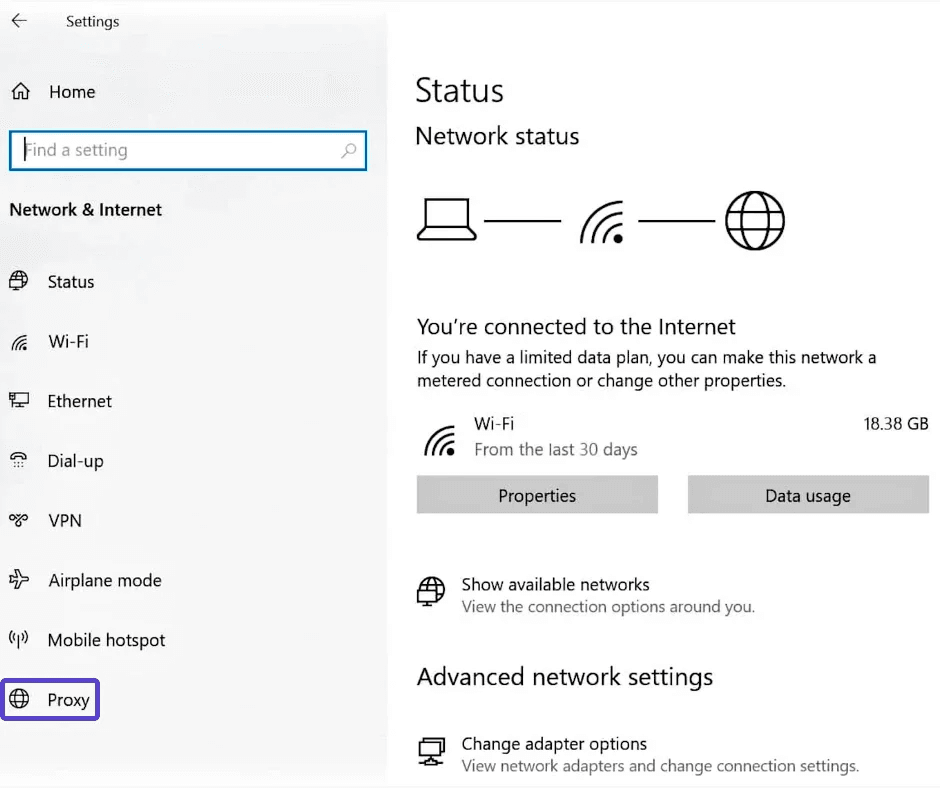
Select the "Proxy" option (in the left panel on Windows 10, in the list on the right on Windows 11).
Sign in to your dashboard and open "My Proxies". If your proxy shows "Pending", press "Start proxy" first. The host and the HTTP port are on the proxy's "HTTP proxy" line (host:port).
Your proxy username is under "Credentials" ("Copy username"). The password is masked: click the eye icon ("Show / hide") to see it, or "Copy password" to copy it. Your account password is not needed for this.
In the proxy settings window, locate the Manual proxy setup section. On Windows 10, ensure that the switch for "Use a proxy server" is toggled on, input the host in the Address field and the HTTP port in the Port field, and click Save. On Windows 11, click "Set up" next to "Use a proxy server", turn the switch on in the Edit proxy server window, enter the host as the Proxy IP address and the HTTP port as the Port, and click Save.
Configuring the Proxy Server in Internet Options
As an alternative to the Settings app, you can enter the proxy in the classic Internet Options window. It edits the same system-wide setting, so use whichever you prefer.
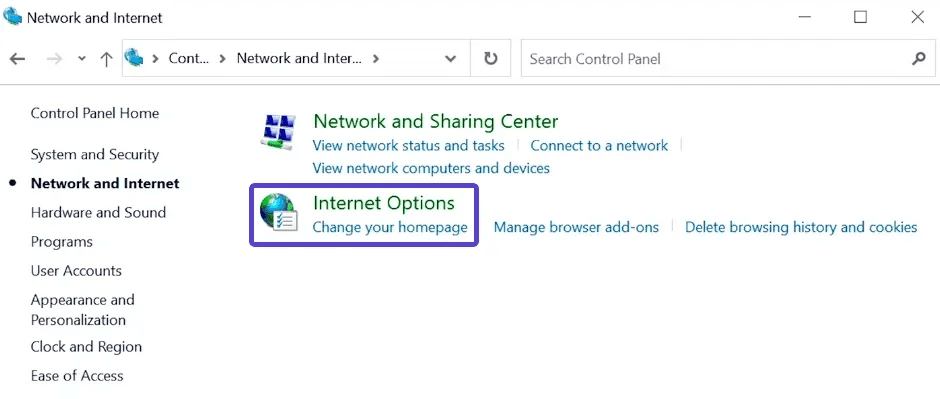
Click on Control Panel > Network and Internet > Internet Options.
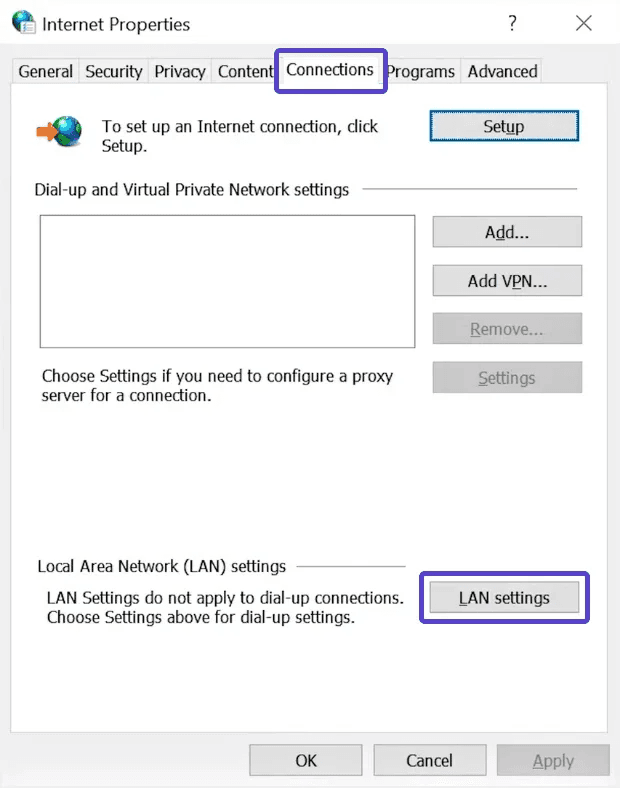
In the Internet Properties window, select the Connections tab and click LAN settings.
Enable "Use a proxy server for your LAN," enter the host in Address and the HTTP port in Port, then click "OK."